Linksys cloud account is a service provided by Linksys which facilitates the user to access their Wi-Fi router, configure/ setup, and also to check the home network from across the globe – no matter wherever you are. It gives you visibility access to the devices connected to your network without being confined to a location. Hence, yes, you also have parental access through this Linksys Cloud Account.
It is basically a dual-band cloud access point, which is secure in nature, and you have everything in your control. You may set a barrier on the files being shared within your network. More benefits are lying underneath this paragraph.
The best part, it is a free bundle of services provided by Linksys that comes with all the new Linksys Wi-Fi Smart routers.
What are the Benefits of Linksys Cloud Account?
You are allowed to do a number of things through Linksys Cloud Account. It is not just a window giving you visibility access to your network’s workings and connections. Linksys Cloud is literally so much more.
- Prioritize Your Media – Prioritize your media platforms on particular bandwidth, games, applications, and devices. The user may also have the power of allotting higher bandwidth on prioritized devices and applications. So, adjust devices and applications in a hierarchy of high priority and of normal priority.
- Parental Control – There are a number of harmful websites for your kid’s brain. Now, keep them away with this smart cloud account. It is not just that you can restrict the website – the user is even allowed to restrict particular devices, just in case required. Moreover, to that schedule the inhibition time period, as in days of a week and hours of a day.
- Separate Guest Network – You may now create separate guest access within your network for more than fifty plus people. Through Linksys Cloud Account, you may put a limit on the number of guests who can join your networking area. A separate guest access tool helps you keep your files and data safe, even after letting others use your network.
More benefits of Linksys Cloud
- Remote Access – The major reason one should opt for Linksys Cloud Account is its remote accessing feature. You are even allowed to create safe spaces for your Wi-Fi Networks from anywhere.
- Customize and Diagnose Wi-Fi settings – Customize and diagnose the Wi-Fi router’s settings as per yourself and your needs. Secure your networks in your own customized ways. Diagnose and troubleshoot all the connectivity issues with our troubleshooting tool. Plus, keep track of your Router’s status to all means.
- Protect your network – Set firewalls, Port forwarding, VPN pass-through, and internet filters with Linksys Cloud Account. This will help you keep your network more private, safe, and secure.
- Validated Network and User – This cloud account has a validation feature for both network and user. This works with the dual verification of the email account, one for the email of the user and the second for the email they supplied for the creation of a cloud account. Hence, Linksys is doing everything to maintain security at its best.
How to Generate Linksys Cloud Account?
Time to generate Linksys cloud account, when you have already known the benefits and reasons why one should get a cloud account of Linksys. First of all, know this – when you are creating the cloud account for the first time, make sure you are connected to the Linksys Wi-Fi router network.
Follow the steps for a smoother creation of Linksys Cloud Account
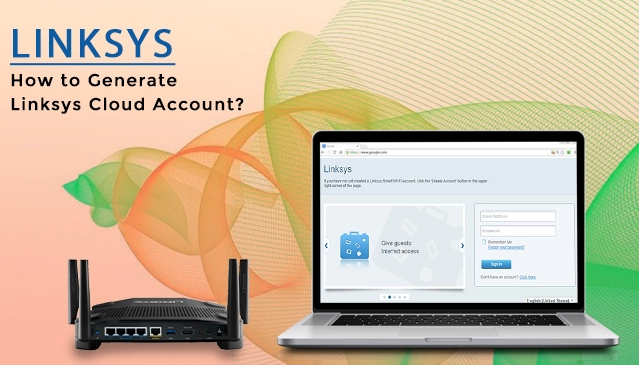
1 – Firstly, open the browser and run the link https://linksyssmartwifi.com/
2 – As you run the link in the browser Linksys sign-in page will open up.
3 – Click on the ‘Click Here’, written on the side of Don’t Have an Account?
4 – Create an account for yourself and make sure to check in both the boxes below the credentials field.
5 – You must have received an email from Linksys Smart Wi-Fi mailer. Just in case it hasn’t arrived – make sure to check the junk and spam folder.
6 – That is a verification email you just received from Linksys. Verify yourself in order to activate the account.
7 – You will see a flashing message regarding the validation of your account. Congratulations, your Linksys Cloud Account is validated.
8 – Now, you may log in to the Cloud Account you just created.
Link the Router with Cloud Account
9 – Associate your Linksys router with your Cloud Account, just by entering the Router’s password in the option Associate router.
10 – Click on Ok for the final confirmation and for linking your Router on the Linksys Cloud Account.
The Creation of the Linksys account is done, and now you also have your Linksys router connected to the Linksys Cloud Account. Hurrah!!!
How to setup Linksys Cloud Account Settings Page?
Account Settings Page is a page where you are allowed to view and manage your Linksys Cloud Account profile. The page is equipped with the security settings where you may include or remove members in your Linksys Cloud Account.
Follow the steps carefully to configure your account settings page –
1 – In order to configure the Cloud account setting page, first of all, access your Linksys cloud account.
Linksys Cloud Account Manager Login
This cloud account manager even allows you to log in to the access points network whenever and from wherever you want.
2 – Open the browser and run the Link https://business.linksys.com/
3 – Time to put those credentials in.
4 – We are hoping that you have successfully put in the credentials of your cloud account. Click on Login.
5 – Two options will pop up on your window; one by the name of New Organization and the second by the name of Test Organization. Choose the appropriate.
Towards Account Settings
6 – On the top right corner, there must be a visible account icon. Tap on it.
7 – When you click the account icon, now click on Account Settings.
8 – Accounts settings page must show the options Profile, Security, and Members. Click on Security.
9 – In the security option, you are allowed to change the password. It is a requirement.
10 – In order to change the password, you need to enter the current password and then opt for a new password. Lastly, make sure to re-enter the newly chosen password.
11 – Save it for further proceedings.
Add Member as Admin
In this very pointer, you are allowed to appoint roles to people, as of Owner and Admin. Later, you are even allowed to transfer the ownership, in case required. For your personal knowledge – you should know this – Owner has all the rights. He can transfer ownership, add-remove members, and access all the configuration points too. While Admin here cannot transfer his admin-ship, he can add-remove Member except for the owner, and he is also allowed to configure all the access points. So, opt carefully who you are choosing as Admin.
12 – On the Account Settings page, there is a third option by the name of Members. Click on it.
13 – As you will click on it, the option of adding Member will pop up. Tap on it to add the members.
14 – In order to add a member, you need to enter their electronic mail address in the given box.
15 – By now, you must have entered their mail address, just below the email address box – there is the option of Selection of role. Give them their appropriate role.
16 – Your work here is done. The Member you wanted to add must have received the invitation mail.
17 – When they will click on Accept Invitation, the system will ask them to create a cloud account.
18 – When they are done creating the cloud account – then, they will be allowed to log in to your network.
Add Other Members
The other two members to add are the manager and Viewer. A manager is allowed to access the network to which they are granted access. They can access network settings too but are not allowed to delete the network or access point. A manager also cannot access the inventory.
About the Viewer – they have read-only permission and can access the granted network only.
1 – Just as we added the Admin in the above-given steps. Reach to the option add a member.
2 – Enter the person’s mail ID.
3 – Time to assign them the role. The other two roles are manager and Viewer. Opt for the one you feel right.
4 – The person will receive an invitation through the mail.
How to transfer ownership of Linksys Cloud Account?
1 – Time to login to the Linksys cloud.
2 – Go to the accounts option that is on the top right corner of your page.
3 – Click on it and go to account settings.
4 – Next to the Member, there is an ellipsis icon. Tap on it.
5 – An option will flash of Transfer Ownership.
6 – Tap on it and Transfer Linksys Cloud Account Ownership.
7 – Confirm in the end.
Remove a member
1 – Login to the Linksys Cloud Account.
2 – Time to go to account. From there, reach to account settings.
3 – Finally, to the options members.
4 – Click on it, you will see a list of members. Whosoever you want to remove, click on the x sign made in front of their name.
5 – Your work here is done, and the person is removed.
How to Add Access Points on Linksys Cloud Account?
This feature allows you to forge a distributed yet secured network connection with cloud management features that can be accessed from anywhere you want. The major query is to set up access points on Linksys Cloud Account. Here are they –
1 – The very first and basic step. Login to your cloud account.
2 – Directly reach the networks page.
3 – You will now be seeing a header flashing on your screen with five options. Click on the second option – Access Points.
4 – Tap on the Blue option “Add New Access Points.”
5 – When you click on that flashing option of adding new access points, you will then see two boxes; one is asking for the MAC address information, and the second asks for the serial number.
Note: Check if your access point is online; only then can it be added.
6 – Enter the information, and your access point will be added successfully.
Now, from there, you are allowed to reboot, rename and delete your configured access points. You are even allowed to move the access points to inventory.
Linksys Cloud Account Firmware Update
In case you want to upgrade your firmware from Linksys Cloud Manager 1.0 to Linksys Cloud Manager 2.0, Follow the steps carefully in order to successfully update the firmware –
1 – Before rushing to the system, document the Serial address or MAC address from your Linksys devices. This is mentioned on the label of the box and also on the bottom of your device.
2 – Login to your Linksys Cloud Account with the link – https://business.linksys.com/
3 – Now you have logged in – time to go to the option Access Points and note down the MAC address and a Serial number of the access point. This is that access point whose firmware you want to upgrade.
4 – Now go to account, then to account settings.
5 – You have four options flashing on the Account Settings; go to the third option by the name of Organization. After that, copy the Organization Code.
6 – Time to register a new Linksys Cloud Manager account for Linksys Cloud Manager 2.0. Use this Link https://cloudmanager.linksys.com/
7 – After that, create a new organization and network. Only then may you proceed further.
8 – After that, go to the devices option, then to access points option.
9 – Now, you must be looking at the rearranged fields.
10 – The account will ask you to enter the organization code that you copied in step 5.
11 – Now, you are allowed to rename the access points. Rename if you want; if not, let it go.
12 – A Warning sign will appear saying, “You will not be able to revert to Linksys Cloud Manager 1.0 after upgrade”. So make sure that you have migrated everything you need.
Updating Firmware
13 – Tap on the flashing option UPDATE.
14 – Then, agree to the terms and conditions for proceeding further. Tap on the Update option present under the terms and conditions check box.
15 – Now, you will see your access point getting updated to the new Linksys Cloud Account Firmware 2.0
16 – Wait till 2.0 goes online from updating.
Congratulations, you have successfully upgraded the firmware from 1.0 to 2.0 BRAVO.
How to resolve Common Linksys Cloud Account Error Messages?
There are some errors with Linksys Cloud Account that are way too common in nature; know them and resolve them on your own. These are here listed below with solution –
- Internet Connection Down – https://linksyssmartwifi.com/ui/1.0.1.2122/dynamic/login.html. Run this link on your browser and enter the router password. Use an Ethernet cable to connect the system to the modem if the internet is not working. Now update Smart Wi-Fi Tools and Router Settings.
Note: The default password is Admin.
- Router Not Found – When you are logged in to Linksys Cloud Account, but it is unable to detect your Router. Now, tap on Retry and further ping the Router.
- The Router is not set up – This may happen because of several reasons. So first of all, make sure of the reason why this is happening; only then can you sort the issue. https://www.linksys.com/us/support-article?articleNum=140189Account Suspended – If the account is suspended, wait for at least two hours before you try to login again. If you do not remember the SSIDs, make sure to press the reset button of your Wi-Fi router. It will set the Router to its factory default settings.
Further more errors
- Unexpected Error 2123 – In order to sort this error, perform the resetting of the Router.
- Error 2112 – This error occurs due to incompatibility of devices or when the user tries to force an invalid MAC address. Make sure of both issues.
- Error 2118 – This is an IPv6 error. So, go to router settings, then connectivity, then internet settings, then IPv6, and finally disable the IPv6. If not resolved, then reset the Router.
- Error 2178 – When network name and IP address of devices are the same in the network. Turn off then on the device, go to network map tool, and rename devices.
- Error 2197 – When a router is in the same IP address as the main Router. Enable and modify the IP address.
How to deactivate Linksys Cloud Account?
In case you want to deactivate your Linksys Cloud Account, follow these easy steps.
1 – Run this link in your browser – https://linksyssmartwifi.com/ui/1.0.1.2122/dynamic/login.html
2 – Time to sign in your credentials.
3 – See the top right corner of your screen. There is a drop-down menu with three options.
4 – Click on My Account. Then, from My Account, reach to Close Account.
5 – Now, click on Close Account. As you will click on it, your account will be deactivated/ deleted. Moreover, all the associations with all the routers will be removed.
We are hoping that by now you have understood a number of things about your Linksys Cloud Account, from the creation to deactivation of account, from the Account page set up of Linksys cloud to sorting the most common errors.
Even if you are finding it hard or if you are unable to perform any of the above-mentioned steps – feel free to reach out to our team. We are here to help you.