
Linksys MR6350 Setup
With the entry of the Linksys MAX-STREAM Mesh Wifi 5 Router, Linksys has ensured a more enjoyable mesh experience using the intelligent Mesh Technology. You can easily set up your Router and can even mount it to the wall. The configuration of the router is not that difficult even if you are a noob in networking technology. Without wasting any time, get started with the Linksys MR6350 Setup process by reading the instructions given below.

Requirements for the setup process for the Linksys MR6350
You require the following things before setting up the Linksys MAX-STREAM Mesh Wifi 5 Router:
- The latest version of the Linksys app
- A modem or the modem router
- Active Internet connection
- Linksys MAX-STREAM Mesh Wifi 5 Router
- Lastly, a Wifi-enabled device
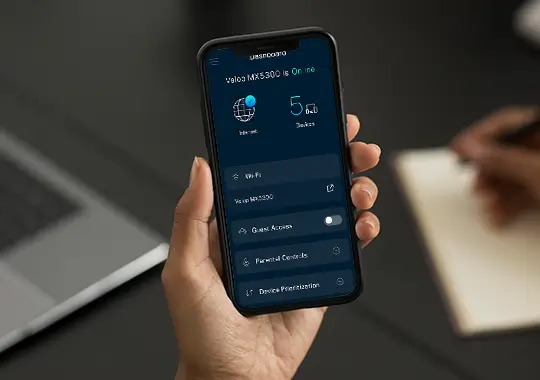
Linksys mesh router setup using Mobile device
Before beginning with the Mesh router setup using the mobile device keep in mind that the modem or the modem router should be connected to the internet port on the router. Set up your Linksys Mesh router using the instructions given below:
- Firstly, power on the node. You may wait until the light turns solid purple.
- Now, open the Linksys app and click on the Set up a New wifi Network option.
- After that, you can click on Mesh Wifi Router (MR Series).
- You can turn ON Bluetooth also if prompted.
- Plug in the node and follow the quick app instructions.
- In case the light on the node is blinking Purple, you can tap Yes, it’s blinking Purple, else tap on No, It’s not blinking Purple for a further set of instructions.
- The app will automatically check for the internet connection. In case there is no connection found, you can click on Do you have ISP settings to enter After which, choose the internet connection type.
- Proceed ahead to create a Linksys cloud account and hit the Log in here Key in the existing credentials.
- The node will be linked to the Linksys cloud account via the app.
- You can now personalize the wifi by creating a wifi name and a password. After this, hit Next.
- Choose the name describing the location of the node which is being set up currently and then click on Next.
- The Node setup is finally successful. Hit the Next button.
How to enable Linksys MR6350 Bridge Mode?
The Linksys Mesh router will not have a separate network when it is in the bridge mode. After enabling this feature, the nodes and client devices connected to the router will be on the same network. They can communicate with other devices within the network. But before beginning follows the below-given requirements:
- Follow the standard router setup process first before enabling the bridge mode.
- Just make sure that you install only the latest version of the Linksys app on your device.
- The device needs to be connected to the local network.
- All other child nodes connected will work on bridge mode after you switch to bridge mode.
- You can also add other nodes by tapping on Set Up a New Product in the menu bar after you switch to the bridge mode.
- The Parental Controls, Priority and many other advanced features are not supported in the bridge mode.

Bridge Mode setup
- Firstly, open the Linksys app to access the Linksys Mesh router’s dashboard.
- On the top left side of the screen, tap the Menu icon
- Choose Internet Settings after tapping on Advanced Settings.
- Select Bridge Mode and then click on Connection Type.
- You can now choose Save.
- When you will Enable Bridge Mode, the devices may disconnect temporarily.
- The app will notify you once the Linksys Mesh router is in Bridge Mode. The dashboard will display Bridge Mode once the router is set up successfully.
LED behavior of Linksys MR6350
The Linksys MAX-STREAM Mesh Wifi 5 Router has a single multi-colored light that is present on the top. The Ethernet port lights are present at the back. Read the LED behavior of lights on Linksys MR6350 router given below:
- The Blue (blinking) light denotes that the WPS pairing has started and you can wait until the pairing completes.
- The Blue light on your router depicts that your device is connected to the internet and the WPS sharing is successful including the router is online.
- The Purple light says that the device is ready to set up. You can now open the Linksys app to follow the instructions and complete the setup process.
- The Purple blinking light signifies that the setup process is in the progress and you must follow the instructions in the app.
- If the router is showing yellow light, it means that the signal is Weak (Child nodes only).
- The Red blinking light says that the device is not plugged into the modem properly and you must make sure that the router is connected to the modem firmly.
- The Red light tells us that there is no internet connection.
- Lastly, the blinking Yellow indicates that WPS pairing was unsuccessful.
How to enable the Auto-Update feature on your Linksys MAX-STREAM Mesh Wifi 5 Router?
Keeping the firmware of the router updated is extremely important as it helps in fixing the bugs and many issues related to the router. With many additional features, the newly updated version comes with improved security features. Follow the steps given below to Enable auto Update feature:
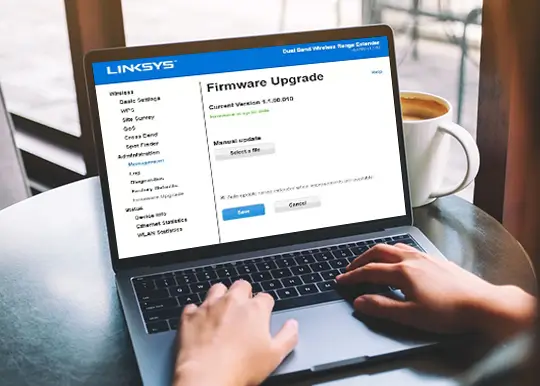
- Start by logging into the web interface of the Linksys router using the default gateway myrouter.local or by signing into the Linksys server account. Once you access the web interface, click on the Connectivity option.
- Tick the box to enable the Automatic firmware update option under the Firmware Update Click on Apply to save the changes made once you are done.
- When the Update Firmware box pops up, you can click on Yes. The firmware update process will begin. Never turn Off the router if you do so, the firmware of the router will corrupt.
- Click on Ok after the Router Reboot screen pops up. The Router will reboot at the end and it might take a few minutes. Again, click on OK once the Firmware update complete screen appears.
Issues with the Linksys MR6350 Setup process
Even if the router setup process may seem smooth, it would give minor or major errors. But, don’t worry as we got your back. Some common errors which you might face during the setup process are as follows:
Facing the issue of Router not found
The Internet is not working properly

Not able to access the dashboard for the Mesh router.
Failing repeatedly in the router configuration.
Not able to detect the node.
Troubleshooting the Linksys MR6350 router issues
Time to troubleshoot the above-discussed errors. Read the tips for the same:
- Firstly, if you are facing the issue of Linksys Mesh Router not being found, you may be prompted to the What type of network are you setting up To troubleshoot this error, ensure that the device is powered on and is showing a solid purple light.
- If you are not able to detect the required node for setup, turn off all the nodes except for the parent node and tap on Find a different node and try again. This scenario occurs usually when the nodes within the network are lit solid purple.
- You can also try to reboot the router. Maybe a simple reboot is all that you need.
- Ensure that you are connected to the router’s wifi to continue with the setup process smoothly.
- It is always recommended to place the child nodes in the same room as the parent node to avoid any interruption.
- Also, check for the ethernet cable connection if you are using any. These must be the same that came along with the package and they must be damage-free as well.
- Keep the firmware of the router updated to prevent any hurdle with the configuration of the router.
- It is never recommended to connect the Linksys Mesh router to any existing Velop network. Always reset the parent node and add it as a child node after the Linksys mesh router is set up for a better wifi performance.
Linksys Mesh Router reset process
Once you decide to reset the router, the customized settings such as the wifi name, password, etc will be erased. You can reset the router using the reset process below:
Manual Reset
- Firstly, Turn ON the router after plugging it into the power source.
- Press the reset button and keep holding it for 10 seconds. You will notice a bright red flashing which will be followed by three to four quick faded red pulses and then the bright red light will display.
Software Reset process
- After logging into LinksysSmartwifi.com, choose the Troubleshooting option under Router Settings.
- Now, go to the Diagnostics tab under Troubleshooting.
- Click on the Reset link under the Factory reset This will reset the router to factory default settings.
- The router will reset after clicking Yes.
The Linksys mesh router has been reset successfully with this.
Conclusion
The Linksys MR6350 Setup process is explained above including the possible issues you may face with the troubleshooting tips. Still, if you want expert guidance, call our experts now. Reach out to them via the toll-free number anytime and clear your doubts.